 So, as we do each Victoria Day weekend, Hubby and I took the girls to the nursery to go get our veggies and annuals (we always plant our vegetable patch and our flowerbeds on the Monday). I picked out my usual assortment of pink, purple and white bachelor buttons, petunias, violets, and Easter bonnets. B, however, wanted orange marigolds. Not exactly the colour scheme I was going for (and frankly, not my favourite flower, either), but much as I would like to deny it, the kid has me wrapped around her little finger, so a flat of the ugly little flowers was added to the batch.
Where to put the dreadful little orange puffs? I decided we would make B her very own fairy garden. This way, she gets to plant and decorate her own pot of flowers and I don't have to find some corner of the garden to place the marigolds. So, while she was napping, I gathered a few craft supplies from around the house and some itsy bitsy odds and ends to make a fairy abode. When she woke up, we planted her garden in a large pot. She was delighted!
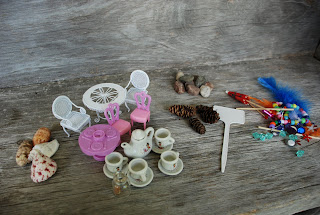
 Here's what we used:
 - A flat of marigolds
- A large terracotta pot
- Some soil and water for planting
- A plastic plant sign
- Pinecones, seashells, river rocks (could also use twigs, acorns, maple seeds, tree bark curls, wood chips or dried leaves)
- Plastic crystal 'jewels' for a magical effect (could also use marbles or mirrored craft pieces)
- Dollhouse furniture (we used white wire patio furniture, but you could easily use plastic dollar store furniture or homemade furniture--think popsicle sticks and glue)
- A cocktail umbrella and cocktail pinwheel (could also use wired craft dragonflies or butterflies)
- Some feathers
- Self-adhesive jewels and stickers (could also use glued-on buttons, wooden charms, foam shapes)
- A string of beads
- Some little bits from around the house (in our case, broken Christmas tree ornaments care of B and the Grant twins. Thanks kids.)

Then, simply remove the flowers from the flat and gently divide them up into pieces. Plant the flowers close together, leaving enough space either up front or in the centre of the pot for the 'fairy garden' decorations.
Pack down the soil surrounding the flowers so that it is not too loose to work with. Lay down seashells, river rocks, tree bark or marbles in the empty space, creating a solid base for the furniture to rest on.
Decorate the outside or rim of the flower pot to fit with your fairy theme--whether it be traditionally natural (in the style of woodland fairies or Tinkerbell) or bright and colourful like B's.
Such a great idea - where do you even come up with this stuff??
ReplyDeleteThis is so cute - I love it!!! Whenever I'm stuck on finding something for Z to do I'll be calling you for ideas!
ReplyDeleteThanks, ladies! I'm always trying to come up with some kind of fun activity for B to do. Hopefully, my sharing these ideas with everyone will inspire some new activities they can share with me! ;)
ReplyDelete